
Why Surface Prep Matters More Than the Paint Itself
I’d fix a failing surface before spending more on paint. Your walls, trim, or cabinets need cleaning, drying, repairs, and the right primer - not just another coat.
Here’s what I’d check before painting:
- Surface condition: Remove dirt, grease, and loose paint; sand rough or glossy areas; and repair damage.
- Material and primer: Match prep and primer to drywall, wood, stucco, or masonry.
- Safety: For homes built before 1978, assess lead hazards before disturbing old paint.
- Coastal weather: In Huntington Beach, wash away salt residue, fix moisture sources, and follow the paint label’s weather limits.
- Written scope: Ask your contractor to list prep work by surface and explain how drying time could affect the schedule.
My rule: <u>solve surface problems first</u>. Paint comes after the surface is ready.
How Poor Preparation Leads to Paint Failure
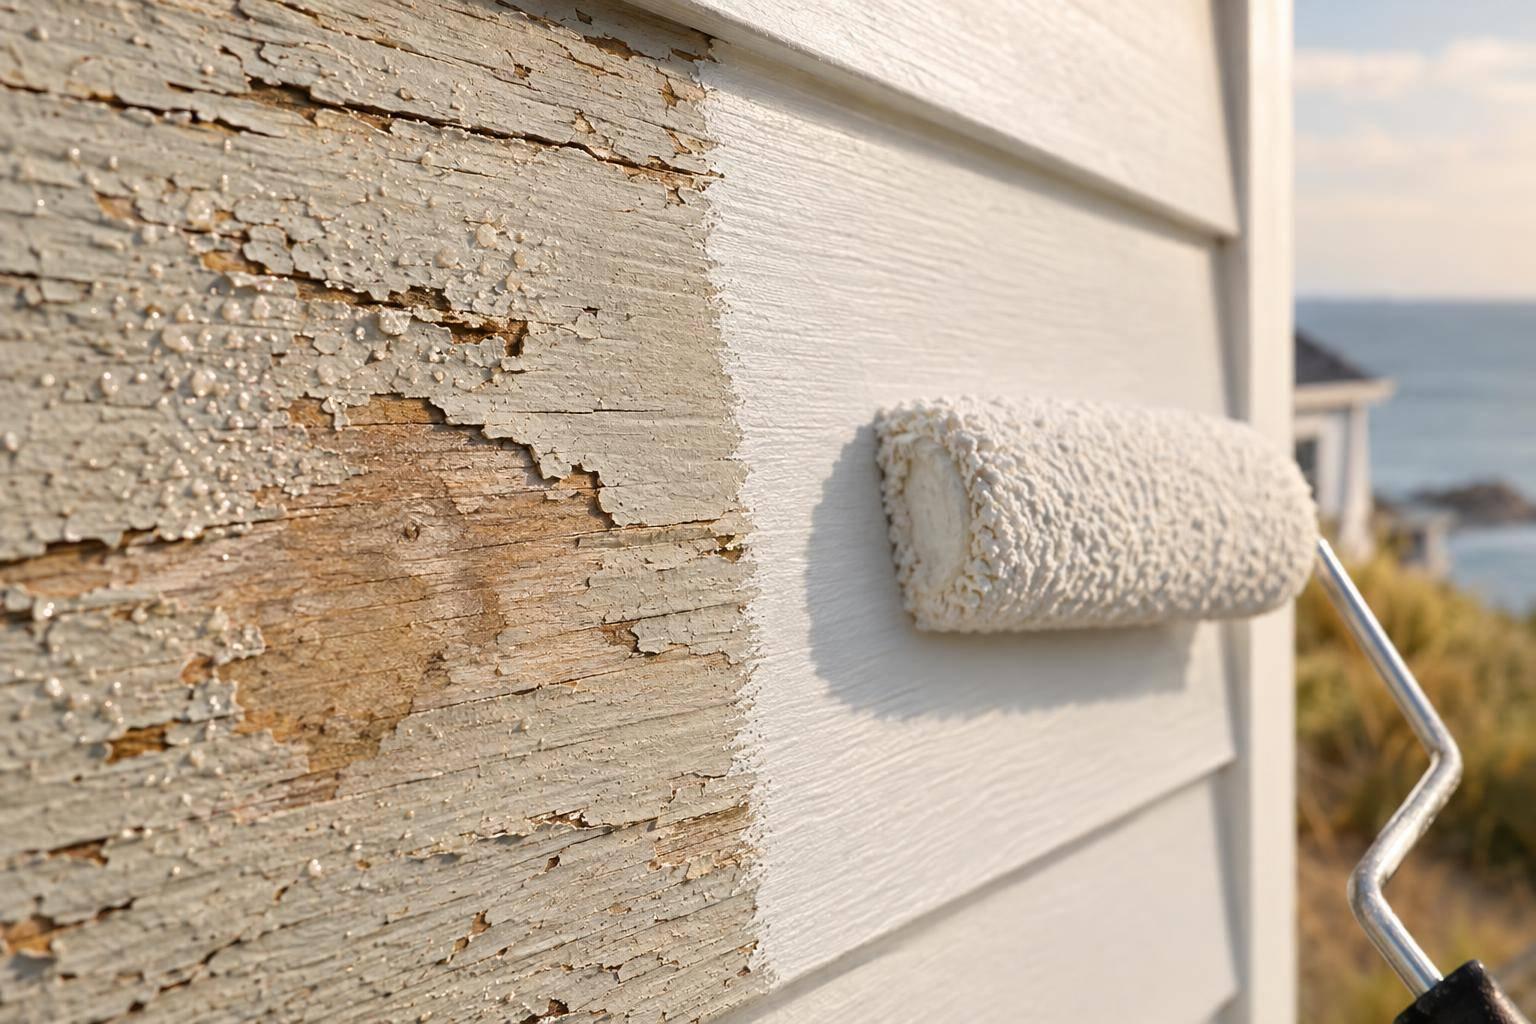
When prep falls short, paint can peel, bubble, or separate from the surface. Dull means glossy areas have been scuffed so paint can grip. Firm means the material underneath isn’t flaking or crumbling.
Dirt, Grease, and Moisture Weaken Adhesion
Kitchen grease, oil, soap residue, mildew, and chalky residue from aging exterior paint can all keep paint from sticking. Check exterior walls for powdery residue and kitchen cabinets for greasy buildup. These deposits need cleaning - not another coat of paint.
Painting too soon after rain or washing can trap moisture beneath the coating, causing bubbles or peeling. Let the surface dry before painting. If you find water damage, investigate the cause rather than paint over it.
Loose Paint and Damage Affect New Coats
A new coat can’t hold failing paint layers in place. Remove peeling paint until you reach a firm surface, then sand the rough edges smooth. Scuff glossy trim so the next coat can grip, and repair rotted wood and cracked stucco before applying finish coats.
Patched drywall can absorb paint differently than the surrounding wall. Without primer, the repair may show through as a dull patch, even when the color matches. Once the surface is repaired and primed, the next step is the prep order.
sbb-itb-ba1d7b9
Prepare Surfaces in the Right Order
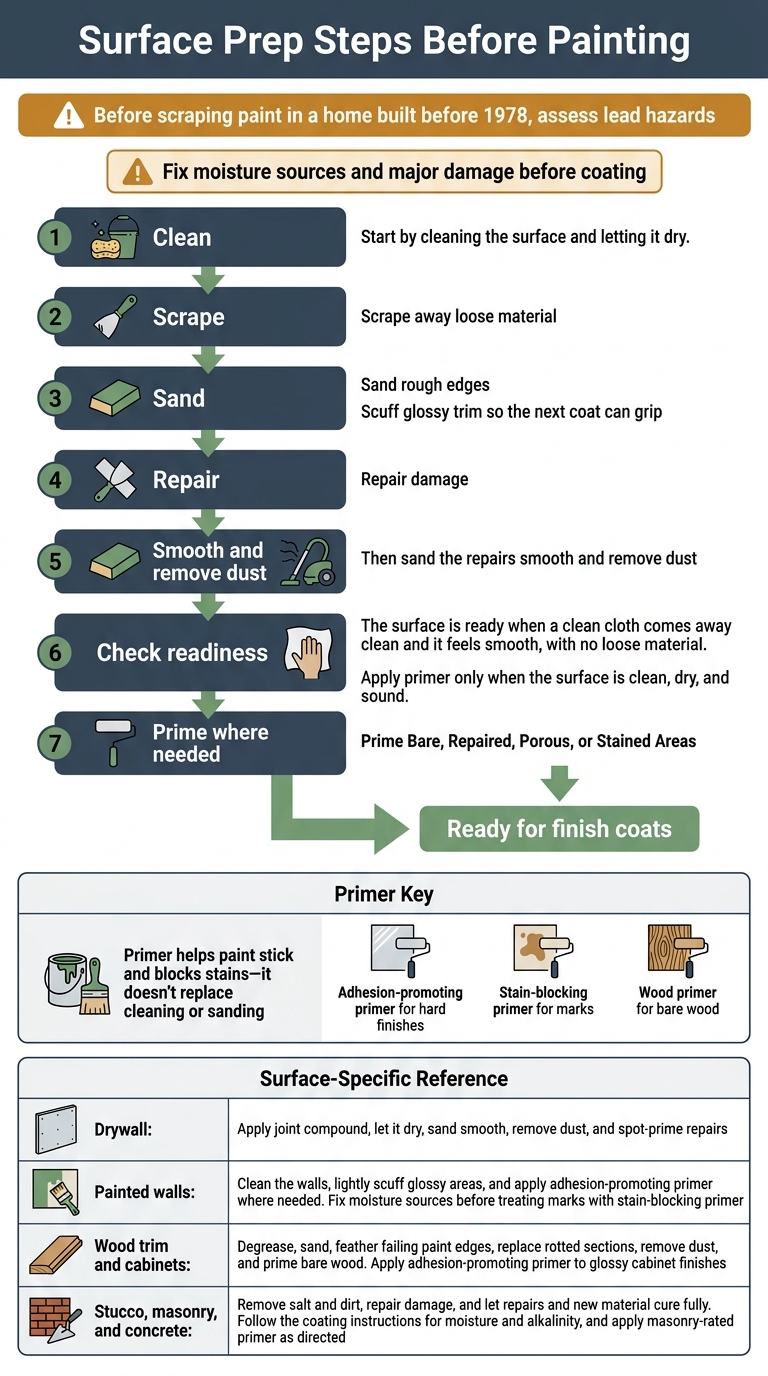
Surface Prep Steps Before Painting
Once you know what’s failing, follow a set prep order before applying any finish coat.
Clean, Scrape, Sand, and Repair
Before scraping paint in a home built before 1978, assess lead hazards. Fix moisture sources and major damage before coating.
Start by cleaning the surface and letting it dry. Scrape away loose material, sand rough edges, and repair damage. Then sand the repairs smooth and remove dust.
The surface is ready when a clean cloth comes away clean and it feels smooth, with no loose material.
Match Preparation to the Surface
Follow the same sequence, but adjust the prep to suit the surface.
| Surface | Prep actions |
|---|---|
| Drywall | Apply joint compound, let it dry, sand smooth, remove dust, and spot-prime repairs. |
| Painted walls | Clean the walls, lightly scuff glossy areas, and apply adhesion-promoting primer where needed. Fix moisture sources before treating marks with stain-blocking primer. |
| Wood trim and cabinets | Degrease, sand, feather failing paint edges, replace rotted sections, remove dust, and prime bare wood. Apply adhesion-promoting primer to glossy cabinet finishes. |
| Stucco, masonry, and concrete | Remove salt and dirt, repair damage, and let repairs and new material cure fully. Follow the coating instructions for moisture and alkalinity, and apply masonry-rated primer as directed. |
Prime Bare, Repaired, Porous, or Stained Areas
Primer helps paint stick and blocks stains - it doesn’t replace cleaning or sanding. Choose adhesion-promoting primer for hard finishes, stain-blocking primer for marks, and wood primer for bare wood.
Apply primer only when the surface is clean, dry, and sound.
Plan for Huntington Beach Conditions
Coastal conditions affect how well prep work holds up. Plan the schedule around the surface, not just the calendar.
Check Exterior Moisture and Weather
In Huntington Beach, prep starts with washing away salt residue, dirt, and mildew before painting. Inspect stucco and exterior trim separately. Look for damaged stucco near the base of the home and hidden water damage at the fascia.
Let surface conditions guide the schedule, rather than a fixed drying time. A lasting exterior finish starts with a clean, dry surface. Follow the coating instructions for temperature, humidity, and recoat time. Check the forecast, too, so each coat has time to cure before rain returns.
Define Preparation Work Before Painting
Ask for a written prep scope organized by surface and repair area. It should spell out where cleaning, scraping, sanding, repairs, and primer are needed, naming each affected stucco area, trim section, and repair location.
The scope should also explain how drying time or wet weather could shift the schedule. During that discussion, point out moisture concerns and weather-exposed areas so the prep plan addresses each condition.
Conclusion: Fix Surface Problems Before Painting
Paint can’t fix an unstable surface. Before painting, clean, scrape, sand, repair, and dry the surface. Then spot-prime bare, repaired, or porous areas with a suitable primer before applying finish coats.
FAQs
How can I tell if my walls are dry enough to paint?
If you’ve recently washed your walls, let them dry completely before painting. A professional can check that the surfaces are dry and ready for paint during a final inspection before application. Don’t rush this step: clean, dry walls help paint bond properly so the finish lasts.
Do I need primer if my paint includes it?
Even if your paint includes primer, don’t skip spot-priming bare wood and repaired areas. This step helps paint stick and keeps stains from bleeding through.
At Sharp's Painting, we focus on washing, scraping, sanding, and caulking before applying coatings. Proper surface prep helps the finish last, look its best, and protect your home from the elements.
How can I tell if peeling paint signals hidden moisture?
Check for paint that’s lifting, bubbling, or peeling off stucco, wood, or trim. These signs often mean water has gotten through the protective coating. Have a professional identify the moisture source before repainting, since moisture can damage fascia boards or stucco.