
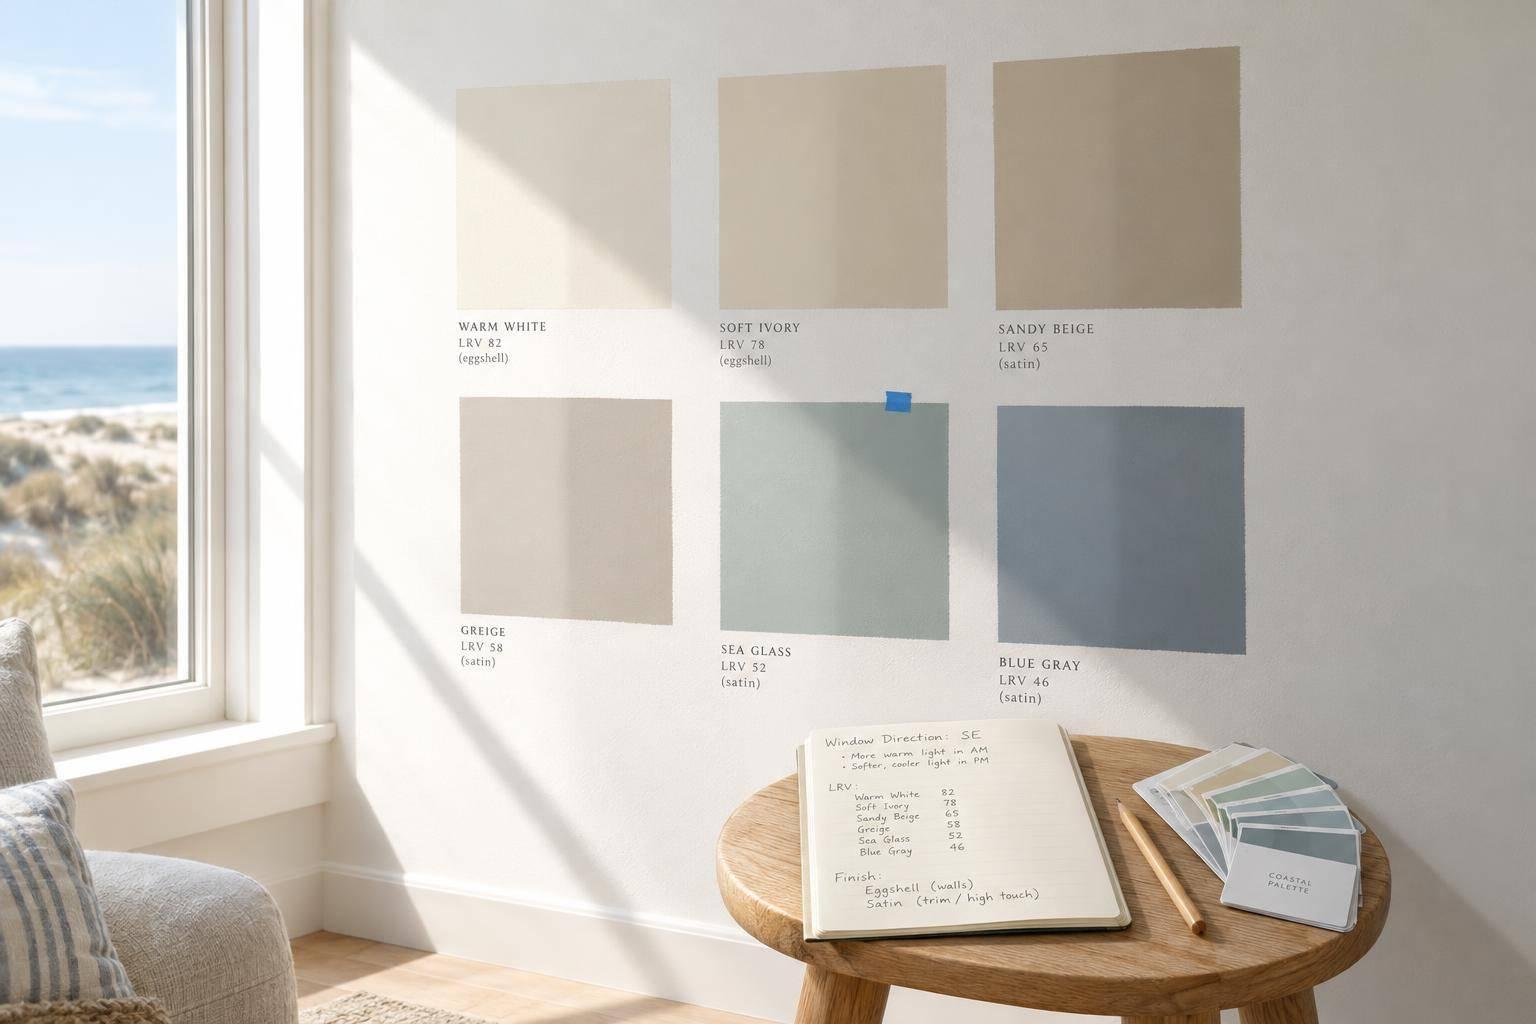
Picking Interior Paint Colors That Work With Coastal Light
I’d choose paint by testing it in your room - not by trusting the chip. In Huntington Beach, I’d start with large samples on 2 walls, one sunlit and one shaded, and check them in morning, afternoon, and evening light.
Here’s what I’d check before making the final choice:
- Window direction: Note when sunlight enters, especially during the hours you use the room.
- Color and brightness: Compare undertones and light reflectance value (LRV) against flooring, cabinets, counters, and trim.
- Connected rooms: View samples from shared sightlines to check how the colors work together.
- Finish and prep: Confirm sheen, repairs, sanding, and primer before painting.
My final step: <u>write down the color name, code, finish, and lighting notes</u> to share with Sharp’s Painting. The goal is a color that works in your daily light, not just in a photo.
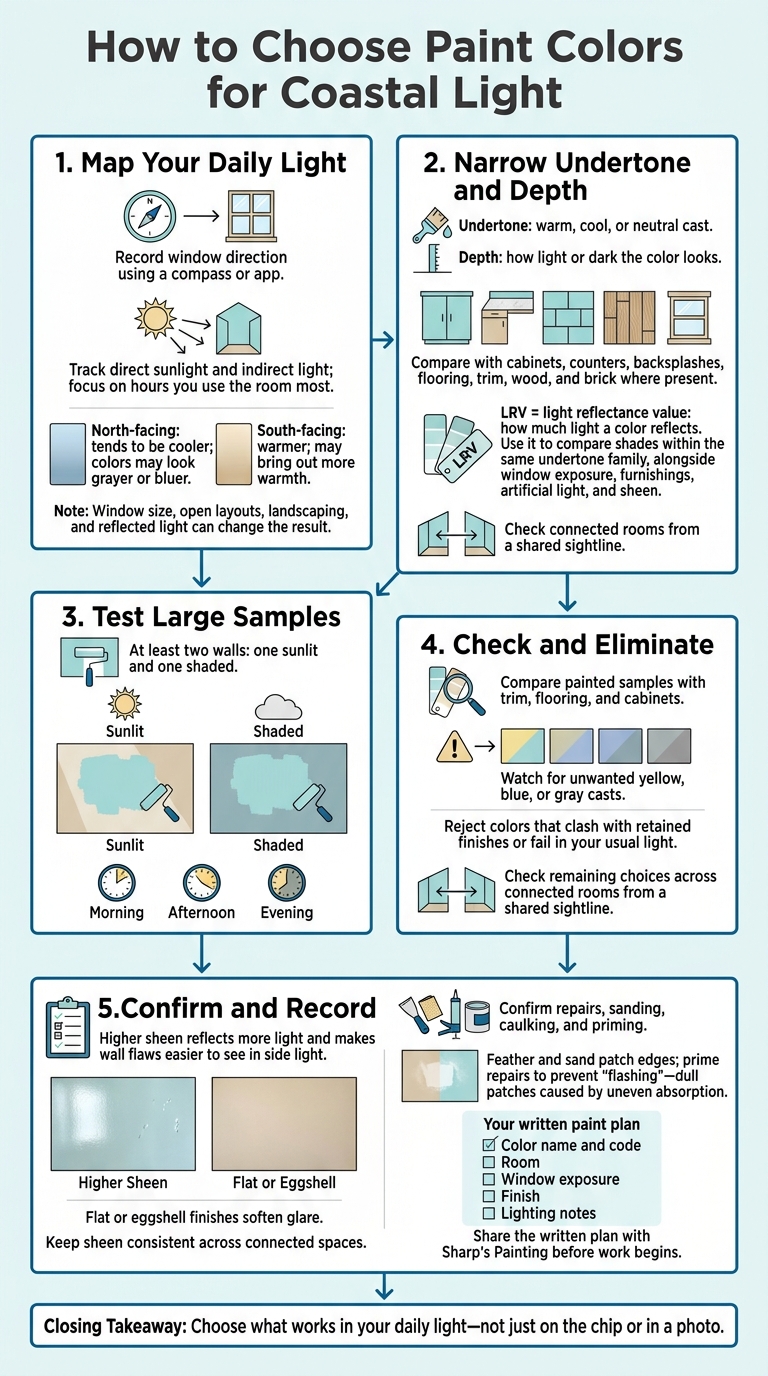
How to Choose Paint Colors for Coastal Light
Check Window Direction and Daily Light
Stand at each main window and record its direction using a compass or compass app.
Track when direct sunlight hits the walls and when the room gets only indirect light. Focus on the hours you use the room most. The color needs to work day to day, not just when the light is at its best.
Compare North, South, East, and West Light
North-facing light tends to be cooler, making colors look grayer or bluer. South-facing light is warmer and can bring out more warmth in a color.
Watch how each direction affects warmth, coolness, and contrast throughout the day. Window size and open layouts can change how the light looks, too. These shifts help you choose which samples to examine more closely.
Look for other light sources and surfaces that reflect light. Landscaping may block daylight, nearby surfaces may bounce light indoors, and a bright sky may brighten the room. These conditions help explain why the same color looks different from one wall to another.
Test samples beside flooring, trim, wood, and brick, since these materials can shift how undertones appear. Use your light notes to narrow down undertones and color depth next.
sbb-itb-ba1d7b9
Choose Undertones and Color Depth
Use your light notes to narrow your palette by undertone and depth. Undertone is a color’s warm, cool, or neutral cast, which coastal light can affect. Depth describes how light or dark the color looks.
Compare Undertones With Existing Finishes
Compare each color with the cabinets, counters, backsplashes, and flooring you plan to keep. These surfaces can make a paint color look warmer or cooler.
Then step back and check it from the main sightline. In an open floor plan, choose a spot where you can see the connected rooms. The wall color needs to work across those spaces - not just on one wall.
Use LRV to Compare Color Brightness
Light reflectance value, or LRV, tells you how much light a color reflects. Use it to compare shades within the same undertone family.
Consider LRV alongside window exposure, furnishings, artificial light, and sheen. The same color can look different on a large, sunlit wall than it does in a smaller room.
Next, test your top choices with large wall samples.
Test Large Paint Samples
Once you’ve narrowed your choices, paint large samples on at least two walls: one sunlit and one shaded. Let the samples on your walls - not the fan deck - guide your choice.
View Samples at Different Times
Look at the samples in the morning, afternoon, and evening. Notice how each color changes as natural light shifts.
Check Samples for Unwanted Color Shifts
Compare the painted samples with your trim, flooring, and cabinets. Watch for yellow, blue, or gray casts as the light changes, and check each sample near a window and in shade before choosing.
Rule out colors that clash with finishes you’re keeping or don’t work in your usual light. For connected rooms, check the remaining samples from a spot where you can see multiple walls at once.
Confirm the Finish and Painting Plan
Once you’ve chosen the color, the finish and wall prep shape how it looks on the wall. Use your sample notes to confirm both.
Review Sheen and Wall Preparation
Higher sheen reflects more light and makes wall flaws easier to see in side light. Flat or eggshell finishes soften glare. Keep sheen consistent across connected spaces.
Before painting starts, confirm the plan for repairs, sanding, caulking, and priming. Feather patch edges and sand them smooth, then prime repairs to prevent flashing - dull patches caused by uneven absorption. Consistent prep helps walls look even after painting.
Record Your Final Paint Choice
Write down the color name and code, room, window exposure, finish, and lighting notes so everyone has a clear plan. Base these choices on what works in your room, not a generic coastal formula. Share the written plan with Sharp's Painting before work begins.
FAQs
How do artificial lights affect my paint color?
Artificial lighting can change how your paint color looks. Light sources have different color temperatures, so a neutral shade that looks warm in one spot may look cooler or more yellow under different bulbs.
When planning your interior painting project with Sharp's Painting, check how your light fixtures affect wall colors. Test paint samples throughout the day and evening to see whether your chosen shade looks consistent in your space.
Should I test paint on cloudy coastal days?
Yes. Test paint colors in the morning, afternoon, and evening - and on cloudy coastal days, too. As natural light shifts, the same color can look different.
Checking samples in these conditions gives you a better sense of how the paint will look in your home than relying on a fan deck alone.
What if my room has windows facing different directions?
When a room has windows facing different directions, its light shifts throughout the day. A paint color that looks warm near a north-facing window may look different in brighter light from the south. Test large paint samples in the room in the morning, afternoon, and evening. Watch how their undertones change before settling on a color.